A Deeper Dive into MQTT
In our last post we understood the MQTT as a whole and the various arenas that it can be used. In this sequel post, we are going to look at the step by step procecss of working with MQTT.
Install Mosquitto
First install Mosquitto, which is the name of a popular MQTT broker, from the linux terminal as so:
Step 1: Firstly update existing packages
sudo apt update
Step 2: Install mosquitto broker Note: press Y and Hit Enter when asked if you would like to continue. Broker will get installed and service would start automatically after executing above command
sudo apt-get install mosquitto
Step 3: Execute following command to install MQTT clients such as publishers and subscribers. So that you can use linux terminal as publisher as well as subscriber.
sudo apt-get install mosquitto mosquitto-clients
Note: press Y and Hit Enter when asked if you would like to continue. Step 4: Execute following command to check for MQTT version
mosquitto -v
You will now have the Mosquitto broker and a couple of utility programs installed. To stop mosquitto service type service mosquitto stop and to start the service again do sudo service mosquitto start you’ll have a very basic and working MQTT broker on port 1883 with no user authentication. You also won’t have websockets yet. Websockets are needed if you have a website that needs to connect to your MQTT broker.
Setup websockets
If you plan on using your MQTT broker for a website, then you need to enable websockets. Let’s create a custom configuration file by updating the mosquitto config file.
sudo nano /etc/mosquitto/conf.d/myconfig.conf
persistence false

# mqtt
listener 1883
protocol mqtt

# websockets
listener 9001
protocol websockets
Note: Make sure you have no extra empty spaces at the end of lines or Mosquitto may report you an error.
Restart Mosquitto with sudo service mosquitto restart and you should now have a working MQTT server on port 1883 and websockets on port 9001.
Installing The Mosquitto Broker on Windows
Download Mosquitto from the official mosquitto website as per your PC specifications. Once downloaded follow the steps below:
Installation Steps
- Double Click on the install script.
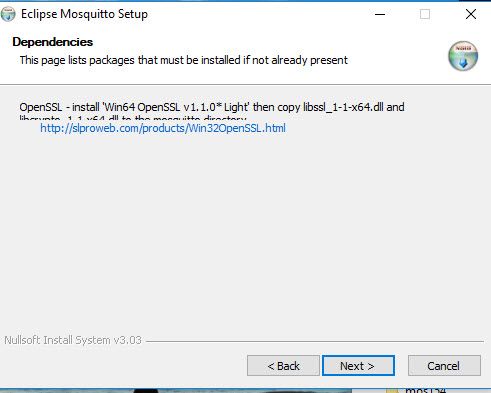
- Note the dependencies screen which tells you what additional files are required.
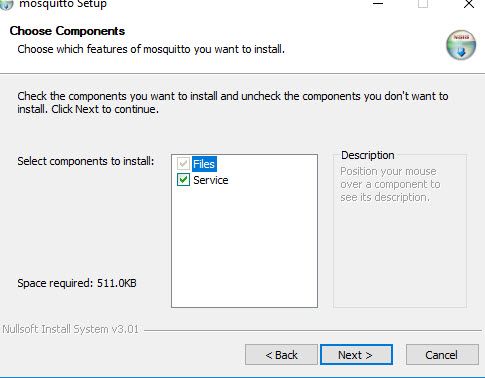
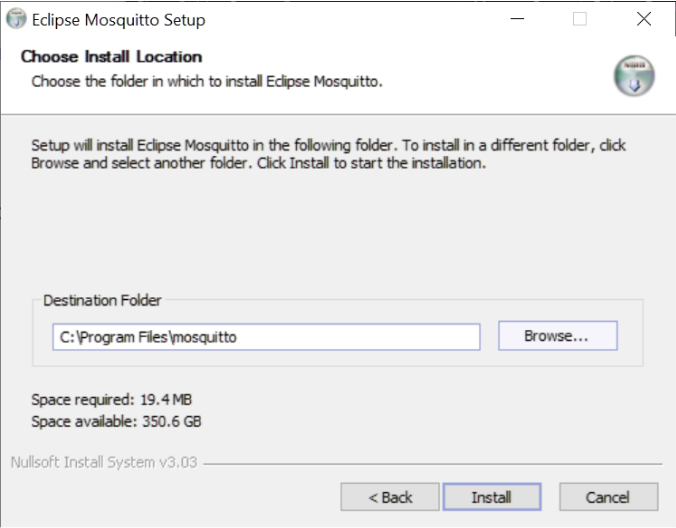
- Select components check service to install as a service if you mosquitto to start automatically when windows starts. 4. Select the location where you want to install mqtt.
 Note: by default, it installs to C:\program files\mosquitto
- Click on Finish.
Note : This will install basic MQTT client
You then need to copy the additional files to the install directory after the install again. The additional files are
- libcrypto-1_1_x64.dll
- libssl-1_1_x64.dll Note 1: You can obtain these files by installing openssl using the files from here or by downloading my package.
Check if Mosquitto installed Successful: Open command prompt and navigate to mqtt install location.
Starting Mosquitto on Windows
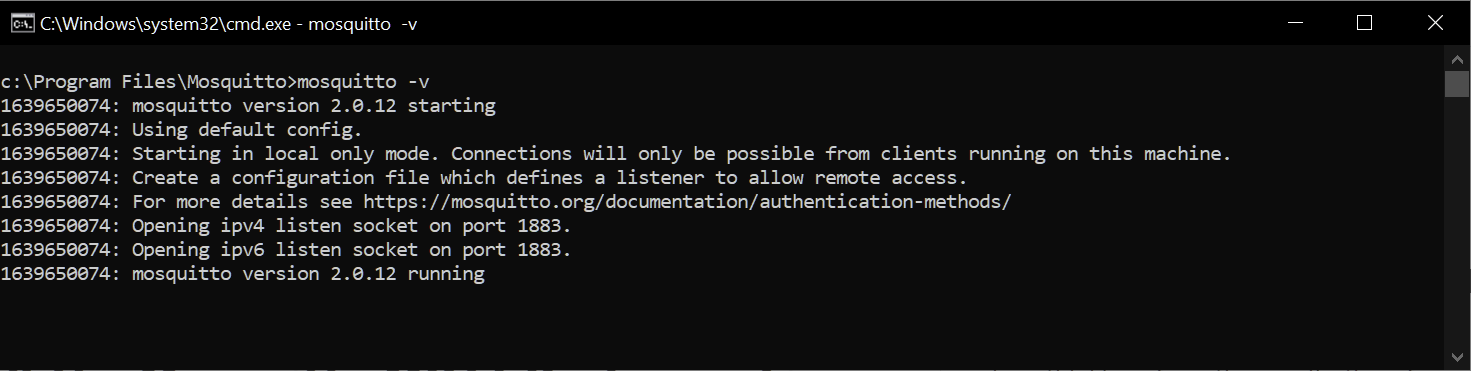
To start the broker manually open a command prompt and go to the mosquitto install directory and type mosquitto.
Type mosquitto -v you will get all your details for installation. Below is a simple example of a client set up.
Testing the install
To test if mosquitto is running use command:netstat -a
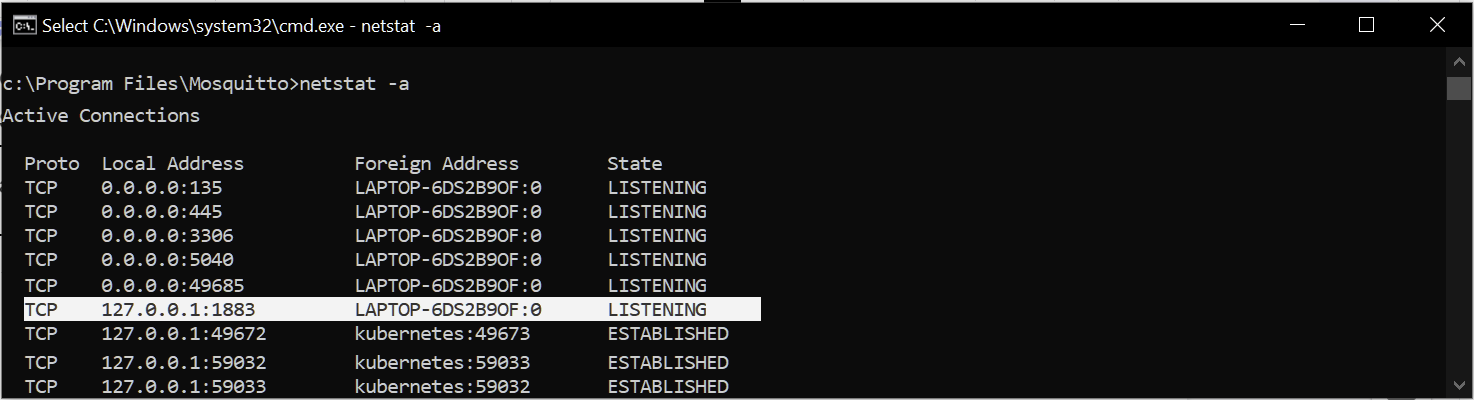 You should see the mosquitto broker running on port 1883 as shown in above screen shot
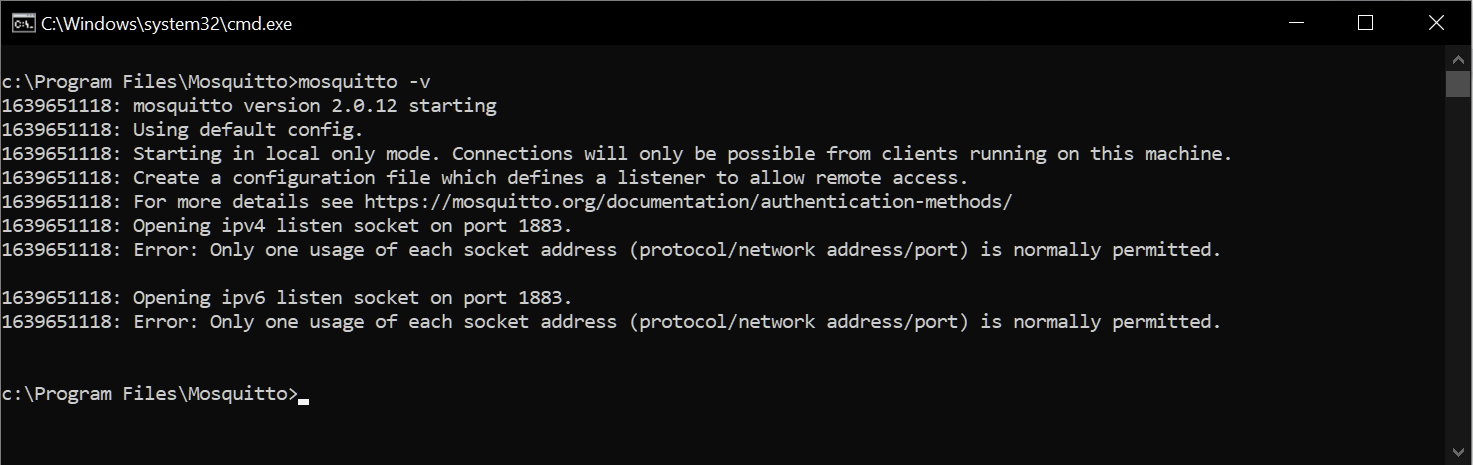
Another quick test is to try to start mosquitto service once again from command prompt which would give an error message complaining port is being in use.
Basic test of MQTT Publish subscribe:
MQTT basic Command consists of:
Subscribe:mosquitto_sub -h [hostname] -t [Topic]

To show topic: using -v will show the topic subscribed with the message.

To Disconnect after a certain number of messages received: -C [number] will disconnect subscribers automatically after a certain number of messages.
Publish: mosquitto_pub -h [hostname] -t [Topic] -m [“message”]

To add user_name and password: user name can be added by setting -u [user_name] and password can be added by setting -P [password] To add retain flag: to add retain flag use -r in message
mosquitto_sub { -h [hostname] --unix [socket path] -p [port-number] -u [username] -P [password] [-t message-topic...] } [-A bind-address] [-c] [-C msg-count] [-d] [-D command identifier value] [-E] [-i client-id] [-I client-id-prefix] [-k keepalive-time] [-N] [--nodelay] [--pretty] [-q message-QoS] [--random-filter chance] [--remove-retained] [ -R | --retained-only ] [--retain-as-published] [-S] [-T filter-out...] [-U unsub-topic...] [-v] [-V protocol-version] [-W message-processing-timeout] [-x session-expiry-interval] [--proxy socks-url] [--quiet][--will-topic topic [--will-payload payload] [--will-qos qos] [--will-retain]] [[{ --cafile file | --capath dir } [--cert file] [--key file] [--tls-version version] [--tls-alpn protocol] [--tls-engine engine][--keyform { pem | engine }] [--tls-engine-kpass-sha1 kpass-sha1] [--tls-use-os-certs] [--insecure]] | [ --psk hex-key --psk-identity identity [--tls-version version] ]]Security: MQTT contains some security mechanisms, still one must take extra care for transport itself. Network level security: Ensure that network is secured. Transport level security: can secure mqtt traffic using Transport layer with TLS/SSL. Application Level security: at Bare minimum level Unique client identification and username/password credentials should be used which is allowed by mqtt.
Payload Encryption: Encrypting payload at application level. U-Blox Thingstream MQTT security: addes an extra layer of security on top of those mentioned above by not exposing the IP address of the device hence protecting Physical connection.
Port forwarding (optional)
You would usually let your MQTT broker handle connections only on your LAN (such as, only letting your LED lights and smart switch connect to it). This way, no outside devices can connect from the internet, which might be very dangerous. The standard way of this is to create a dashboard environment to display the data. But on some occasions, it may be necessary to connect to the broker directly from the Internet through your firewall, such as for remote access to an administration site, or to accommodate devices from multiple buildings into a single central server. In such cases, you must set-up port forwarding on your network router.
You can do this by accessing your router’s control panel. Each router’s settings are handled differently, but it is usually found in the “Routing” section of the configuration. In order to use it, you must know the IP address of the MQTT broker’s computer, and preferably make it static. You can then allow traffic for port 1883 to the Internet. Be careful while doing this, as anyone knowing your Public IP address may be able to connect, unless you have used authentication. Also it is best to make use of encryption in order to prevent Man in the Middle attacks.
Use MQTT with Python
Python is a high level general purpose programming language that lets you work quickly and integrate systems more effectively. Its object oriented approach helps programmers write clear logical code for small and large scale projects. Using paho-mqtt library users can write code to create clients and implement connection, subscribe, messaging and other functions between client and MQTT broker.
Installation: Use the standard “pip” tool for installation, either pip install paho-mqtt Or pip3 install paho-mqtt depending on your Python environment u are trying to install
Use MQTT Import paho library:
from paho.mqtt import client as mqtt_clientEstablish connection:
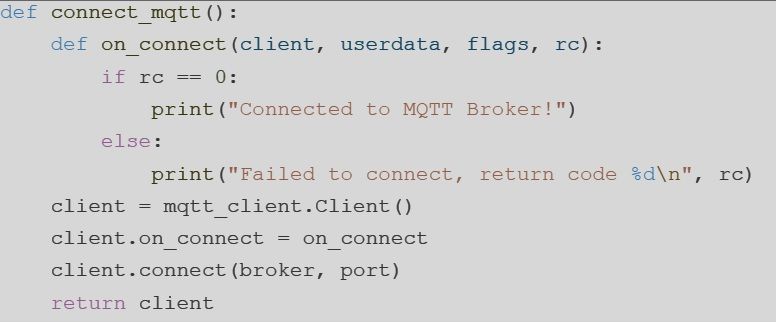
This creates a client instance using the default parameters, assigns a callback to be called once a successful connection has occurred, and starts the connection.
The Client() constructor has some optional parameters:
client= mqtt_client.Client(client_id=client_id,clean_session=True)If you do not specify a client_id, a random id will be generated for you (and clean_session must be set to True).

client.on_connect = on_connect client.connect(broker, port)The connect callback function on_connect will be called after connecting the client, and we can determine whether the client is connected successfully according to rc in this function. Usually, we will create an MQTT client at the same time and this client will connect to the broker.
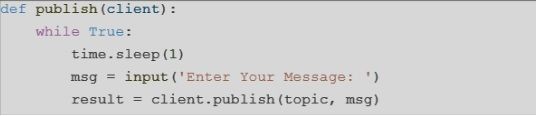
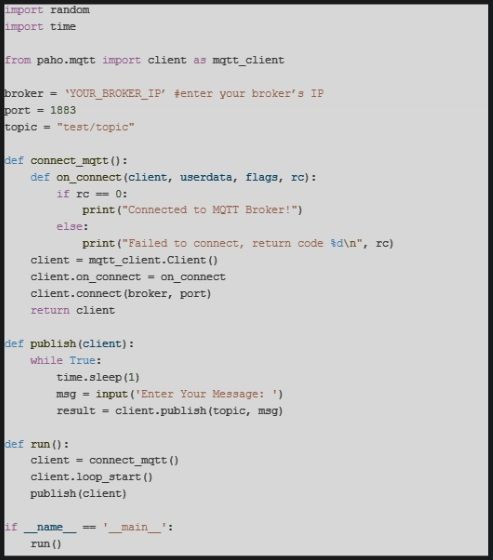
Publish Messages:
We define a while loop. In this loop, we will set the MQTT client publish function to send messages to the topic "test/topic".
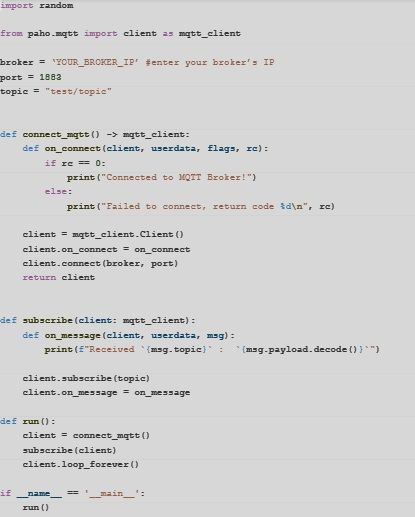
Subscribe:
 Write the message callback function on_message. This function will be called after the client receives messages from the MQTT Broker. In this function, we will print out the name of subscribed topics and the received messages.
client.subscribe(topic)Final code to publish:
Final code to subscribe:
To test this out, run subscribe code before the publish code.
Reference: How to use MQTT in Python How to setup your own MQTT Broker – O'Brien Labs How to Install The Mosquitto MQTT Broker- Windows and Linux Steps to install MQTT Broker on Linux – BytesofGigabytes